Murphy Bed Installation Guide
YOU WILL NEED:
Level, Power Drill, #2 Square Drive Bit, Stud Finder, Phillips Screw Driver, 5/32 Allen Wrench, 1⁄2 Socket and 1⁄2 Wrench
SUPPLIED PARTS
Shelf Clips, 3 1⁄2” Screws, 5⁄8 Black Flat Head SO, 1 1⁄2 Black Screws, Connector Bolt & Nut, 1 1⁄4 Screws SO, Spring Covers, Bed Mechanism Bar and Springs.
INSTRUCTIONS:
Step 1:
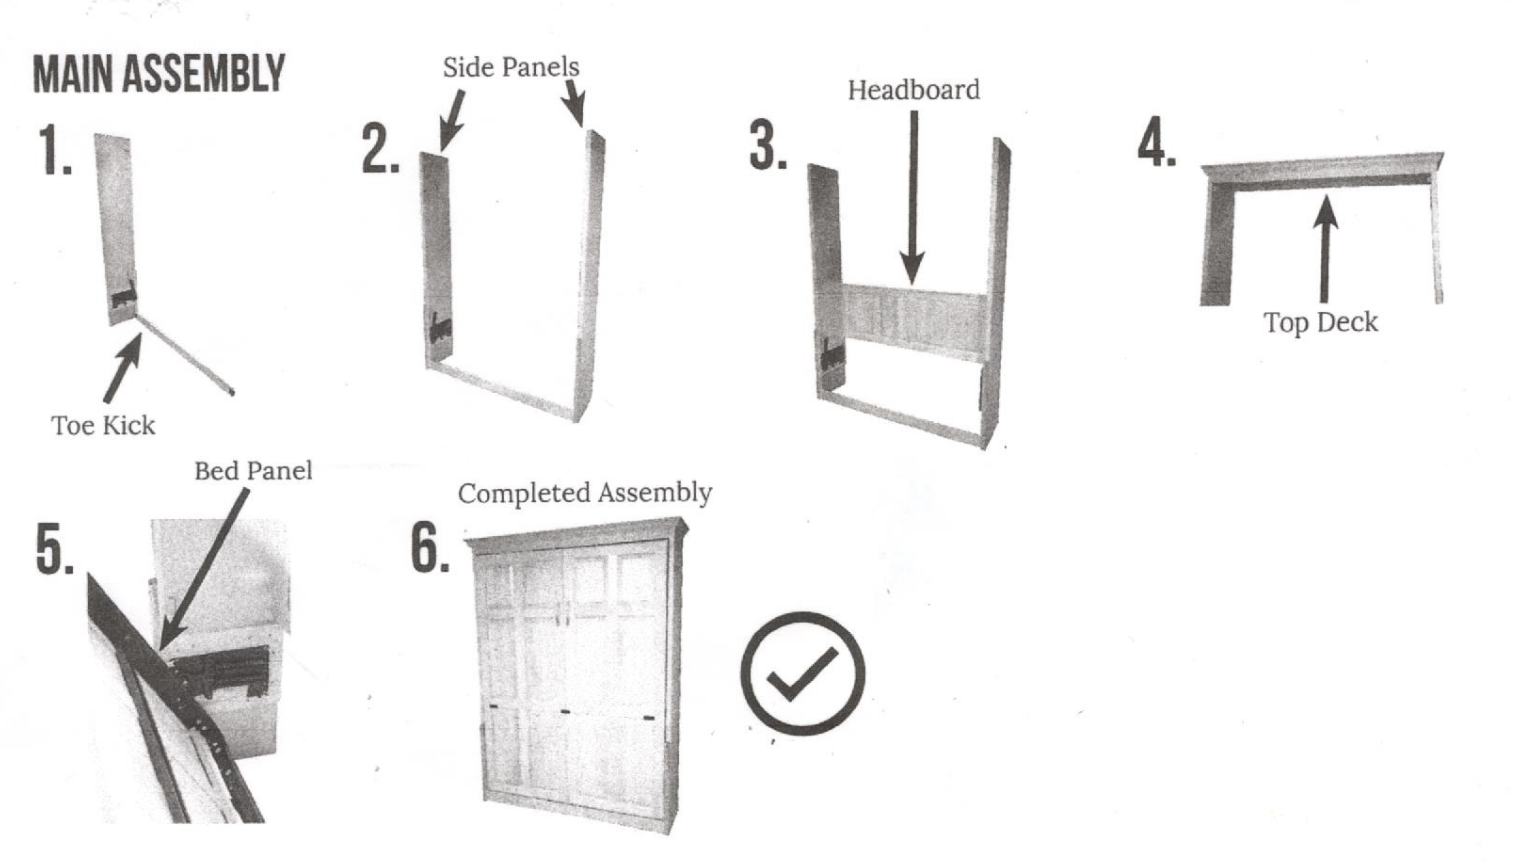
Attach toe kick unit to side panel units by standing side unit up and attaching toe kick unit to side panel unit using (3)-1/2″ screws through metal bracket. Then repeat for the side panel unit.
Step 2:
Attach the head board unit to the inside of side panels using (8) – 1 1⁄4 “, pocket screws.
Step 3:
Attach top deck unit to top of side panels using (4) – 1 1⁄4 ” pocket screws in back of top deck & (6) – 1⁄2 ” screws through metal brackets on front side of top deck.
Step 4:
Attach the assembled unit to the wall using 3″ to 4″ screws through the runner on the inside back of the top deck to wall studs (where possible).
No exceptions. Must have no less than 3 screws in studs, 4 if possible.
Step 5:
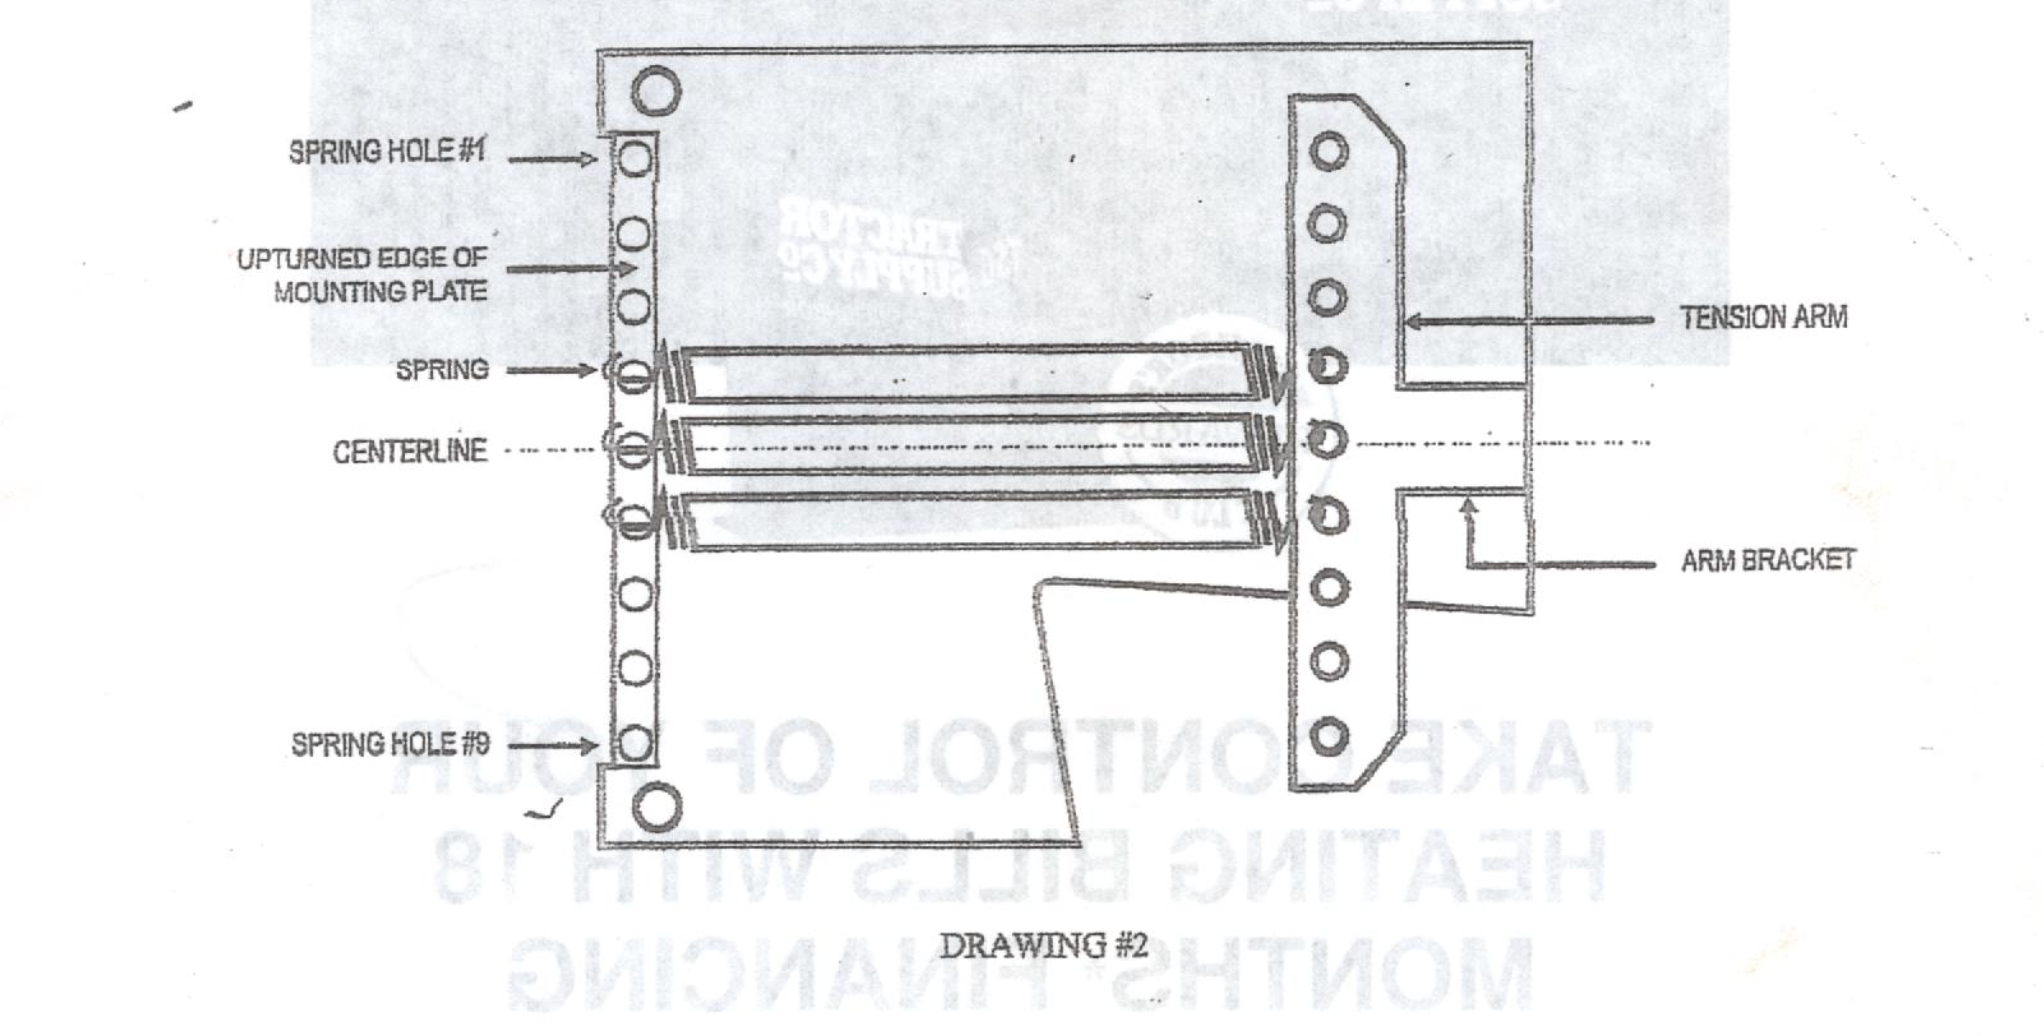
Install appropriate amount of Bed panel springs (I) to bed panel mechanism on insides of panels & according to the weight of the mattress. Will come with 4 springs already installed. Recommended amount of springs:
● Twins: 4 springs on both sides.
● Full: 5 springs on both sides.
● Queen: 6 springs on both sides.
Step 6:
Use the supplied bar to pull the bed mechanism forward and lock in place with a swivel latch on the back of the bed mechanism bar.
Step 7:
Insert bed panel onto bed mechanism using bolts already inserted in sides of bed panel. After siding the bed panel onto the mechanism, insert bolt (E) through panel and mechanism arm on either side of bed panel, put on nuts and tighten using (2) – 1⁄2 ” wrenches.
Step 8:
Install mechanism spring covers (G) using (2) – 1⁄2 ” black screws that are supplied.
Step 9:
Pull down the bed panel and put on the mattress (if the mattress is too light, it will come back up off the floor. If this happens, you must remove the bed panel and remove a spring. If it is too heavy, you must remove bed panel and add a spring)
Step 10 (Optional) Bookcases:
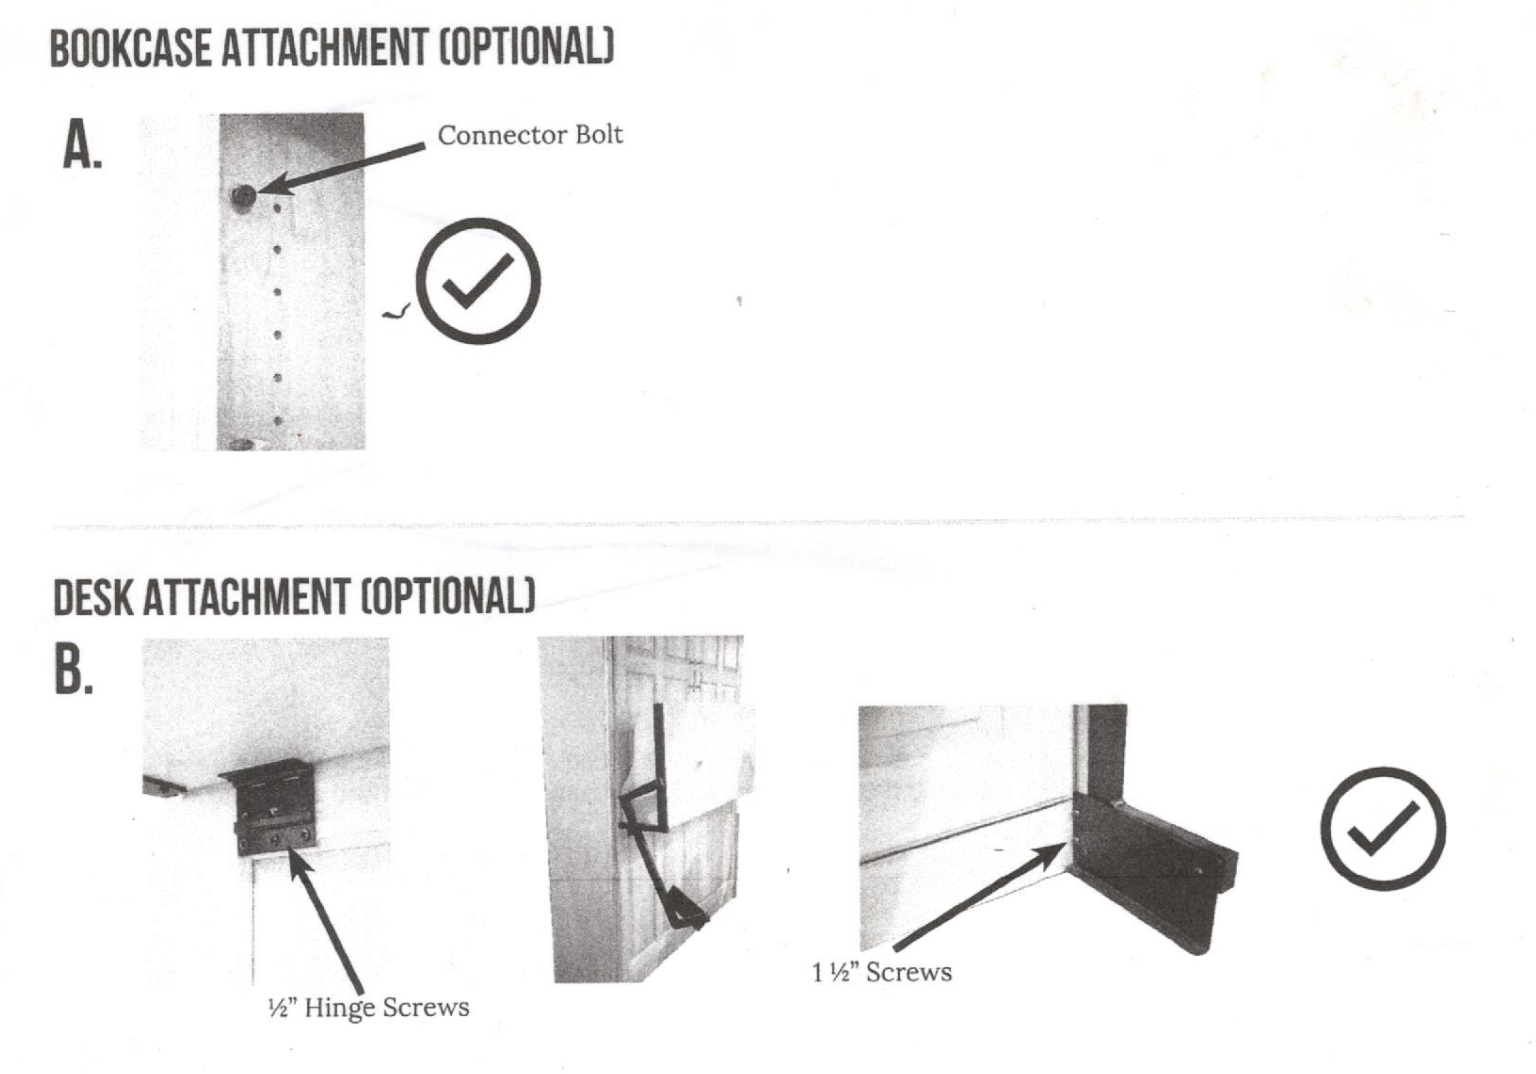
Attach bookcases with connector bolts.
Step 11 (Optional) Desk Unit Only:
Attach the desk to the bed panel with (8) – 1⁄2 ” supplied screws on underside hinge, as well as (2) – 1 1⁄2″ screws on each side of the desk supports on bottom.


MECHANISM
You should have an equal number of springs on each side of the center hole. It is OK if the top of the mechanism is not balanced yet.
Use the same number of springs and the same layout on both the left and right mechanism.

